Hello All! Wow, it's been almost a year since I've posted! I have been busy beating cancer! I finished chemo in June and had surgery last month to have my ostomy reversed. All scans are clear so I just have to go in every 3 months for bloodwork to make sure I'm really cancer free.
I have also listed several new files in my Etsy shop. If you get a chance, check it out!
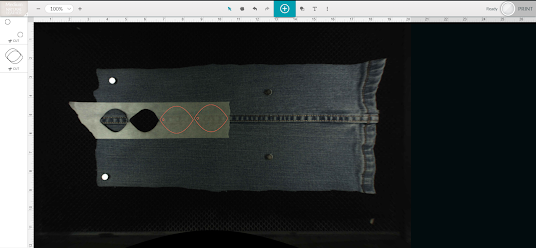
I'm really trying to not spend a bunch of money on supplies in the new year since I have tons of stuff I haven't even used yet. I've been wanting to try cutting denim with my Glowforge and made these really cute earrings.

First I cut the jeans up using the inseam as the middle of the earrings. I ironed the piece flat and put it in the Glowforge. I then cut them using medium Proofgrade Leather as the setting but changing the speed and power to 180/Full. Depending on your denim weight, you may need to use a faster or slower speed. Try to place the seam in the middle of the design. I held the denim down with magnets and I did mask but I don't think it's necessary to do so.
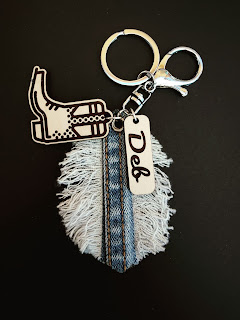
Cutting takes about 20 seconds and is the easiest part of making the earrings. Then you have to fray them by pulling out the threads one by one... This is actually demonstrated on a keychain size piece.

Here's the keychain I made using the denim and wood charms. I used an eyelet in the hole to make it more secure: